 MindHub
How to play Nonogram
Read the numbers at the head of each line to work out which squares to fill. Get them all and a hidden picture appears. Also known as a picross or griddler.
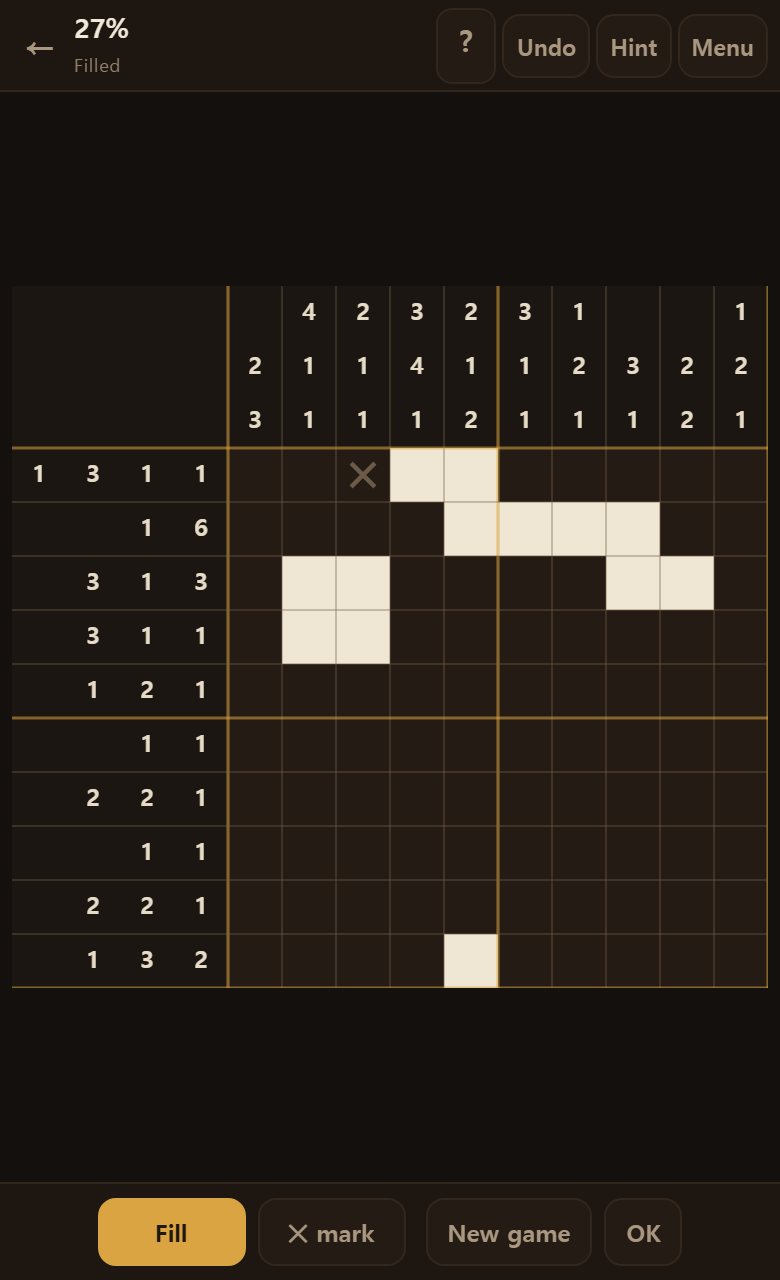
First, look at the screen
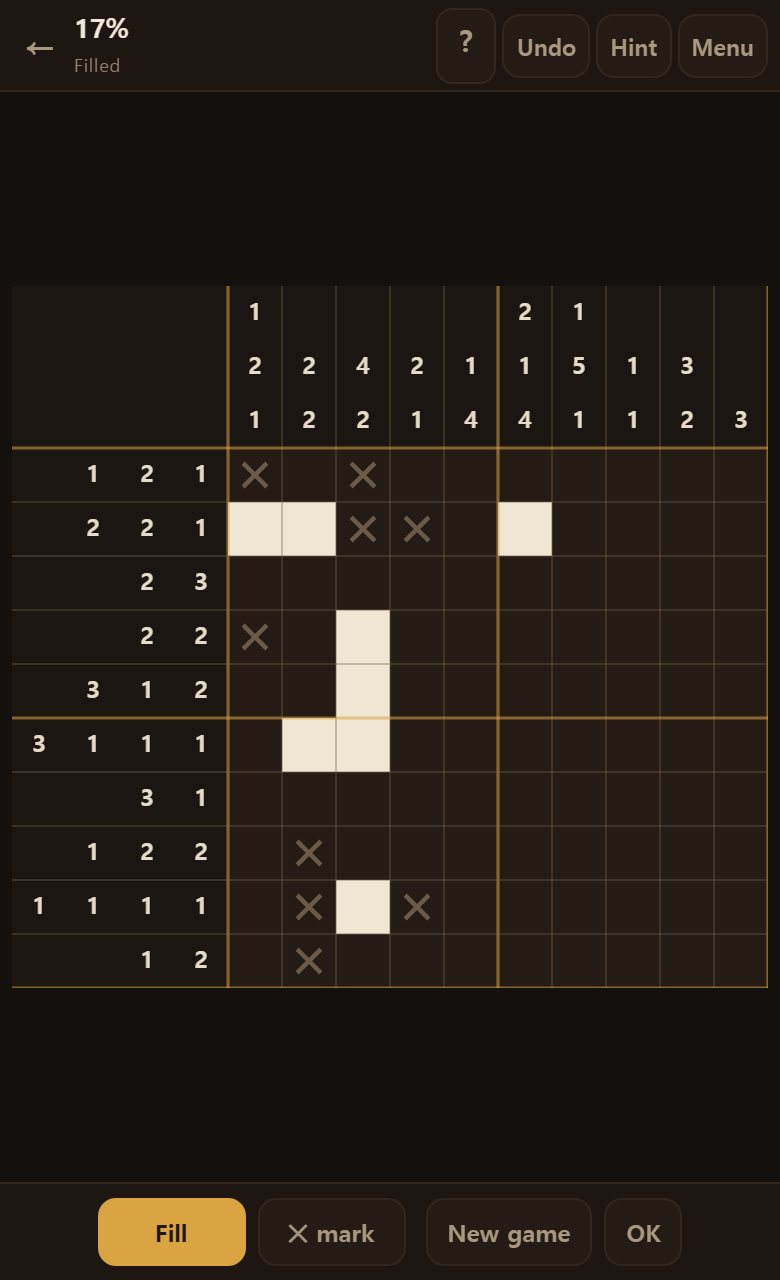
There is a grid of squares, with numbers written along the left and the top.
- Numbers on the left — they tell you how to fill that row.
- Numbers on the top — they tell you how to fill that column.
- The squares in the middle — this is what you fill in.
- The buttons below — switch between filling and ✕, and call a hint.
You start with an empty grid
At the start nothing is filled and only the numbers are there.
It looks impossible to know where to begin, but read the numbers and there is always a certain square. You never start by guessing.
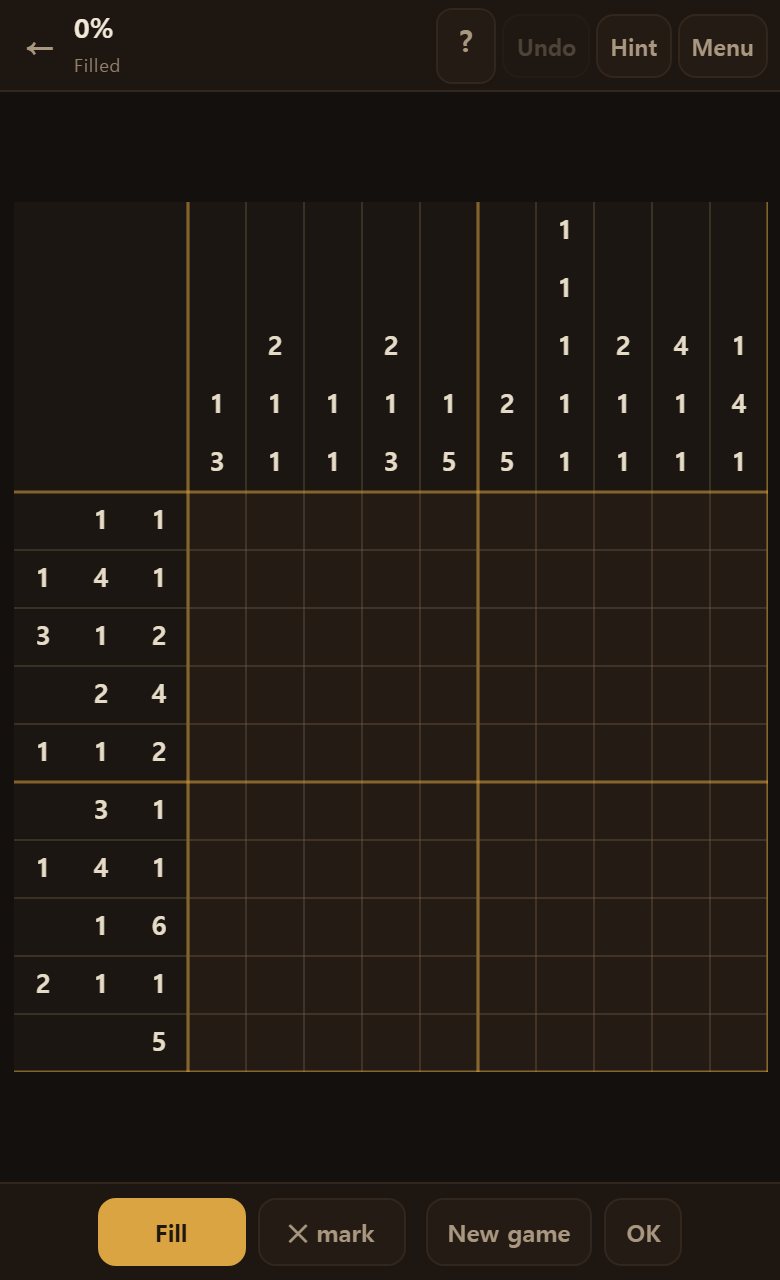
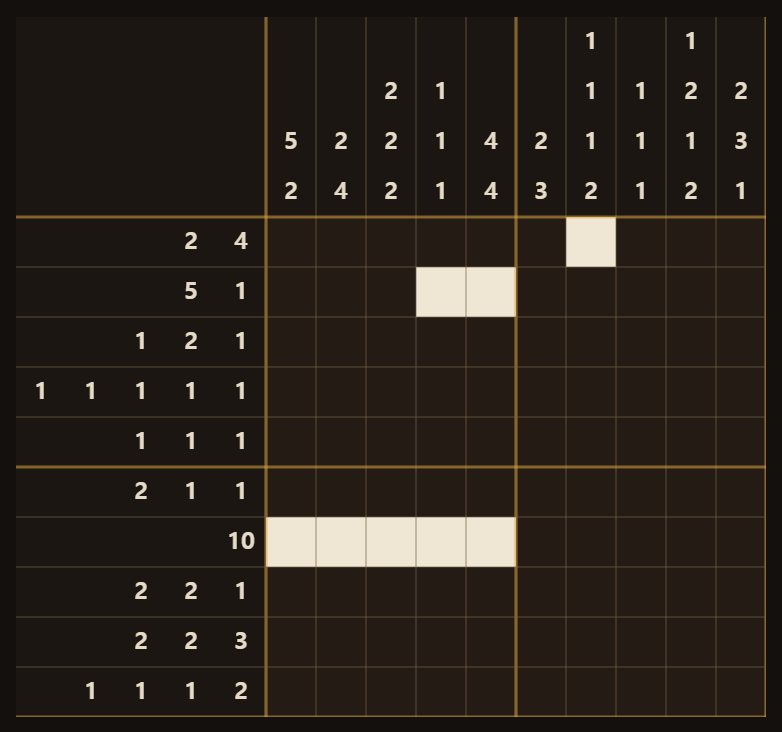
Start with the line holding the largest number. Why, is explained under “overlap” below.
How to read the numbers
A number is how many squares are filled in a row.
A 3 at the head of a line means three squares somewhere in that line are filled side by side. Where, you do not know yet.
- Numbers 2 1 mean two squares together, then a gap, then one square.
- Between blocks there is at least one empty square. Otherwise they would run together as one.
- The order of the numbers is the order of the blocks. The leftmost number is the leftmost block.
- A 0 means nothing in that line is filled. Cover the whole line with ✕.
- Add the numbers together, plus the gaps between them, and you have the squares the line must use.
For instance, a ten-square line marked 3 2 needs at least 3 + 1 (gap) + 2 = six squares. That leaves four squares of slack.
Filling and marking ✕
Tap a square and it fills. Tap again and it becomes an ✕. Tap once more and it is empty again.
An ✕ is your own note saying “definitely not here.” You need not write them, but the grid reads far better when you do.
- Drag your finger and every square it passes fills at once. Handy for filling a run.
- The button below switches between filling and ✕.
- Made a mistake? Undo at the top takes it back.
- An ✕ is not part of the answer. When you finish, the ✕s simply vanish.
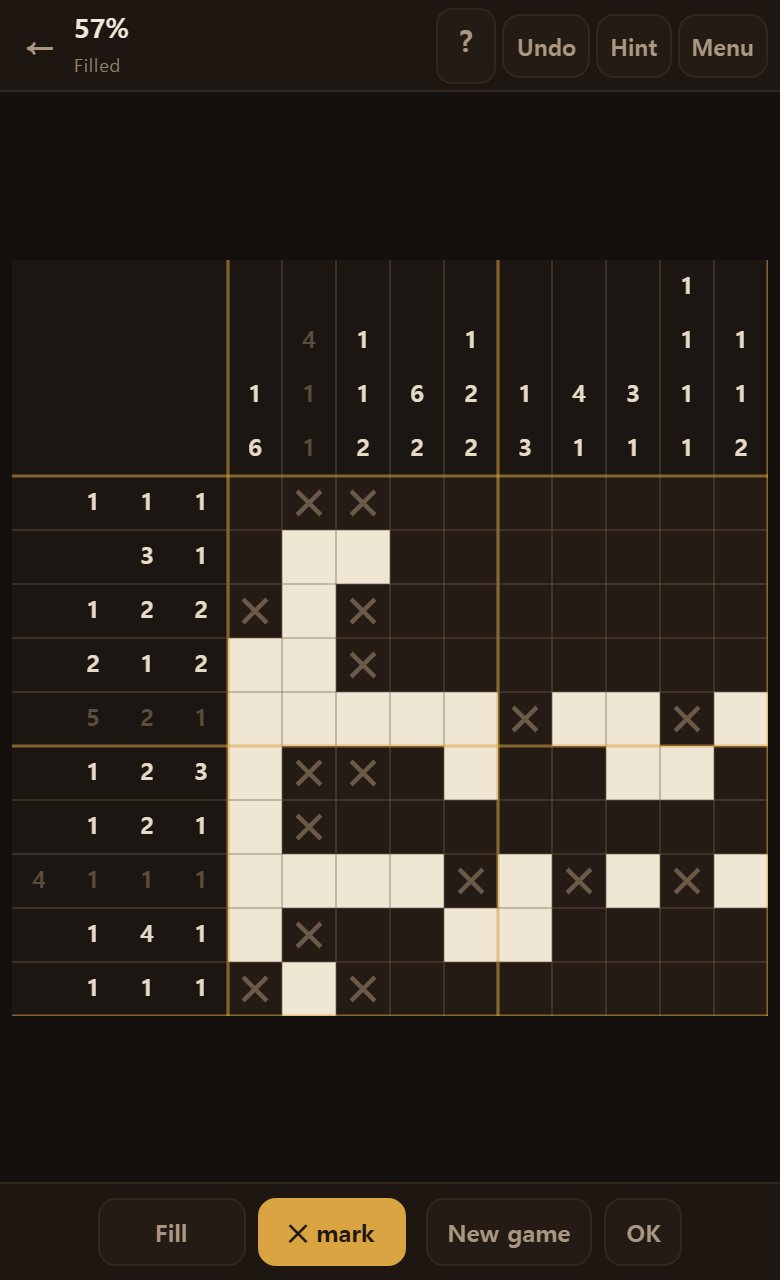
You can solve without writing ✕s. But then you count the same line over and over. Writing down what you have settled, as you settle it, is the quickest way in the end.
Where to begin — overlap
The easiest way is to start with the lines holding big numbers.
Take a five-square line marked 4. Push it to the left end or to the right end, and either way the middle three squares are filled.
Pushed left it covers squares 1234; pushed right, 2345. Squares 234 overlap, so they are filled whichever way it sits. That makes them certain.
- Do the pushing in your head only. There is no need to fill anything in to test it.
- The overlap is number − (line length − number). For a 4 in five squares: 4 − 1 = three squares.
- With several blocks, subtract the room the earlier blocks need before you push.
- The smaller the slack (line length minus squares required), the more overlap you get.
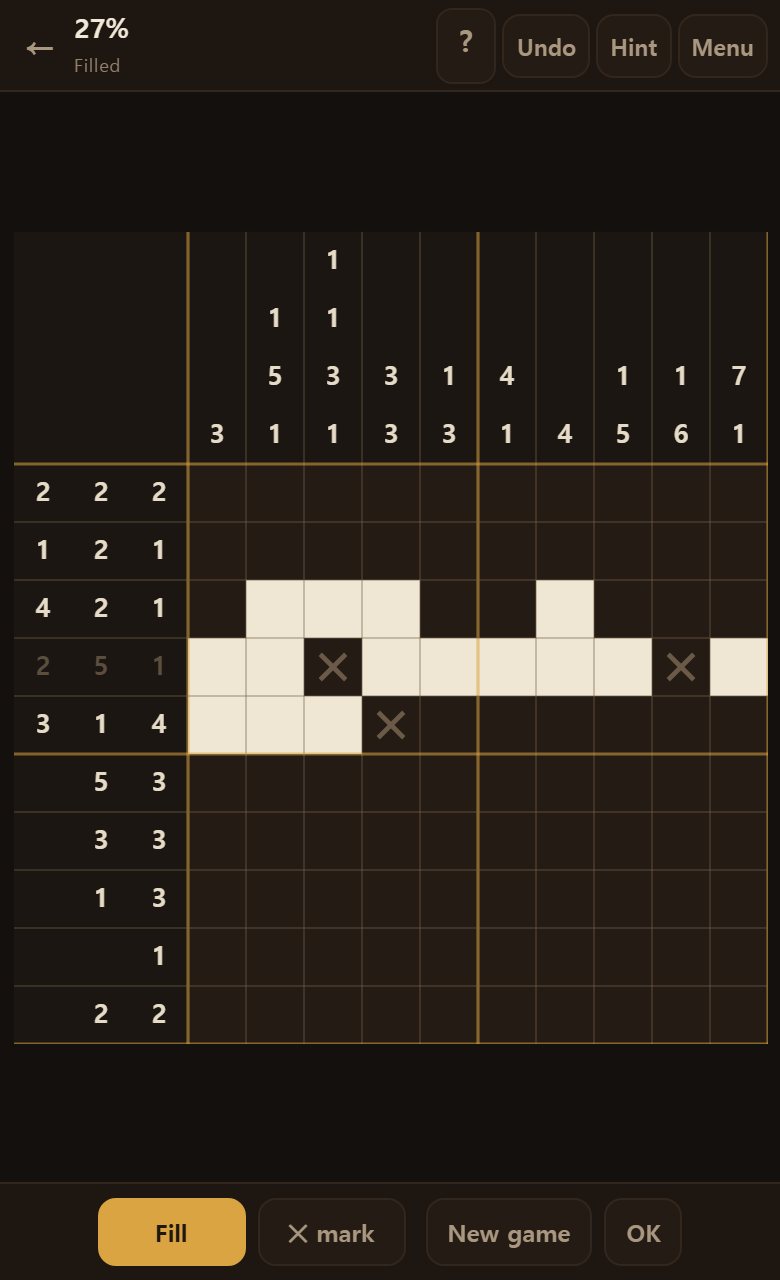
The closer the number is to the line’s length, the more certain squares fall out. Start there. Any number larger than half the line’s length is guaranteed to produce an overlap.
A finished line: ✕ the rest
Once a line’s numbers are all placed, every remaining square in it is empty. Fill them with ✕.
The columns crossing those squares suddenly become easy. Going row → column → row, narrowing a little each pass, is what this puzzle is.
- Once a block is fully filled, the squares on either side are ✕ too — a block is exactly that long.
- Counting from the ends is good as well. An end is a wall, so there are fewer possibilities.
- If the very first square of a line is filled, the first block starts there, and that whole block is settled at once.
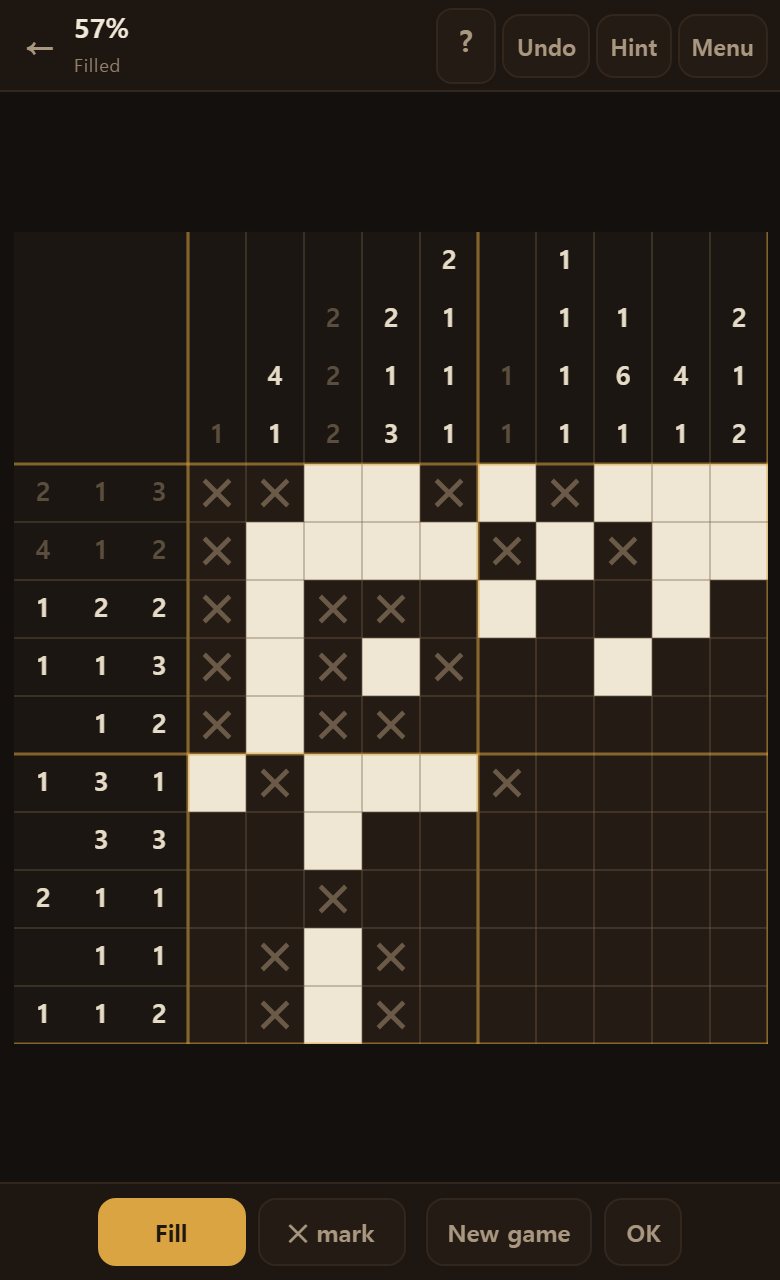
A square won from a row becomes a clue for a column, and one won from a column becomes a clue for a row. That back-and-forth is very nearly the whole puzzle.
What to do when you are stuck
When overlap yields nothing more, try these.
- Look at both ends. An ✕ at the head of a line pushes the first block along by that much.
- Where a square is already filled, work out which block could contain it.
- Take what a row gave you and hold it against the columns. That is where the new information is.
- Lines with a single number (a 7, say) solve most readily. Look at those again.
- When a block is complete, put an ✕ on each side. That one step often opens the way.
- If still nothing, press Hint once, then count for yourself why the square it points at is certain.
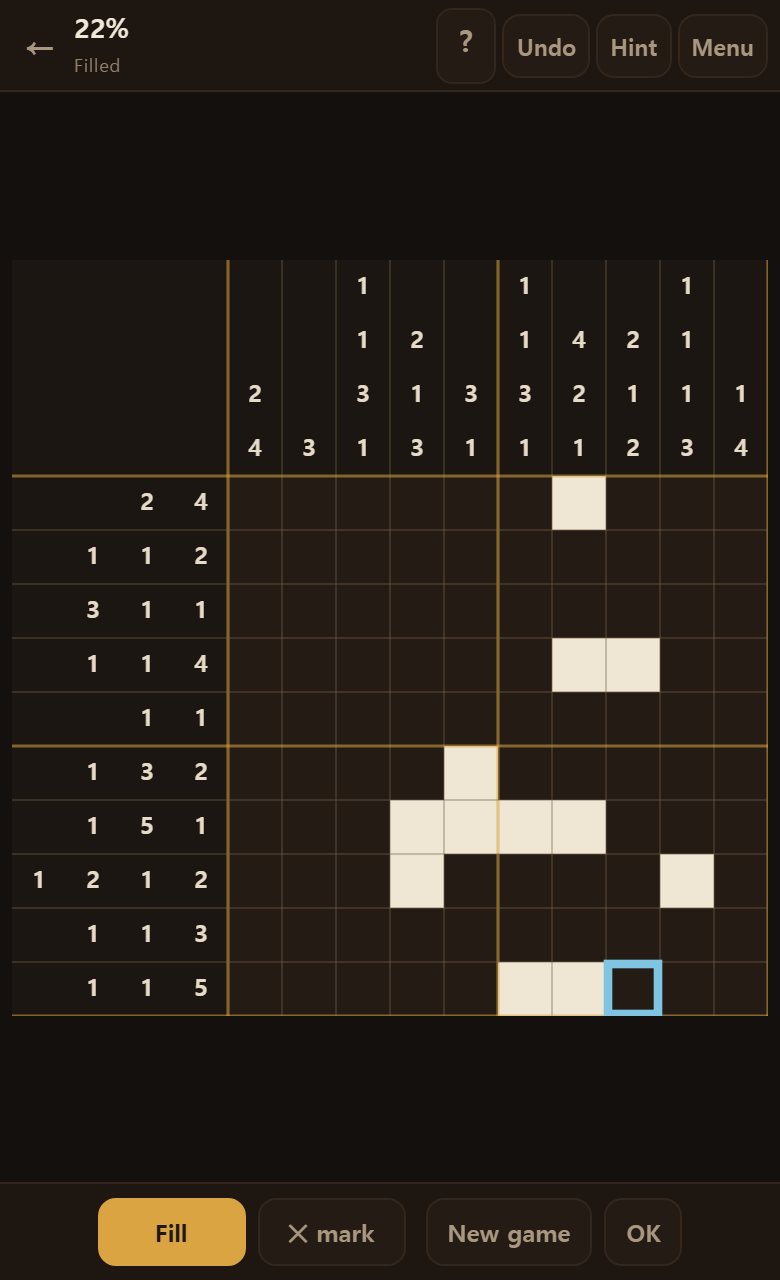
Being stuck here does not mean there is no information — it means there is a line you have not read. Every puzzle here is built so that reading the lines one at a time carries you to the end.
Only puzzles that never need a guess
Some nonograms cannot be solved line by line and demand that you reason across several lines at once. That is merely hard, not fun.
Here we deal only puzzles that solve to the end by reading one line at a time. Having a single solution is not enough on its own.
So if you are stuck, there is a line you have not read.
- Before a puzzle is dealt, we solve it through with line-by-line reasoning only.
- If that does not finish it, the puzzle is thrown away and built again.
- So every puzzle here can be solved without guessing.
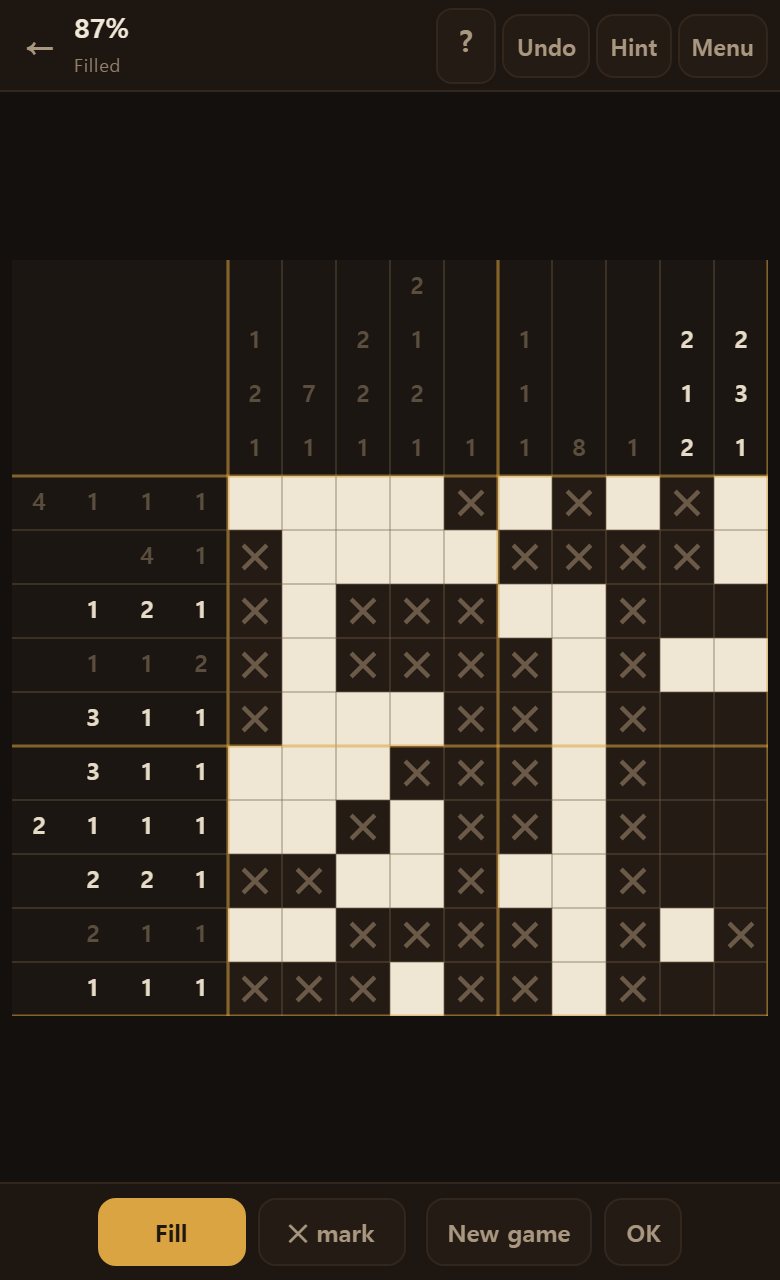
If you are stuck, press Hint. It does not give the answer — only one square that is certain from what you already know.
When you finish
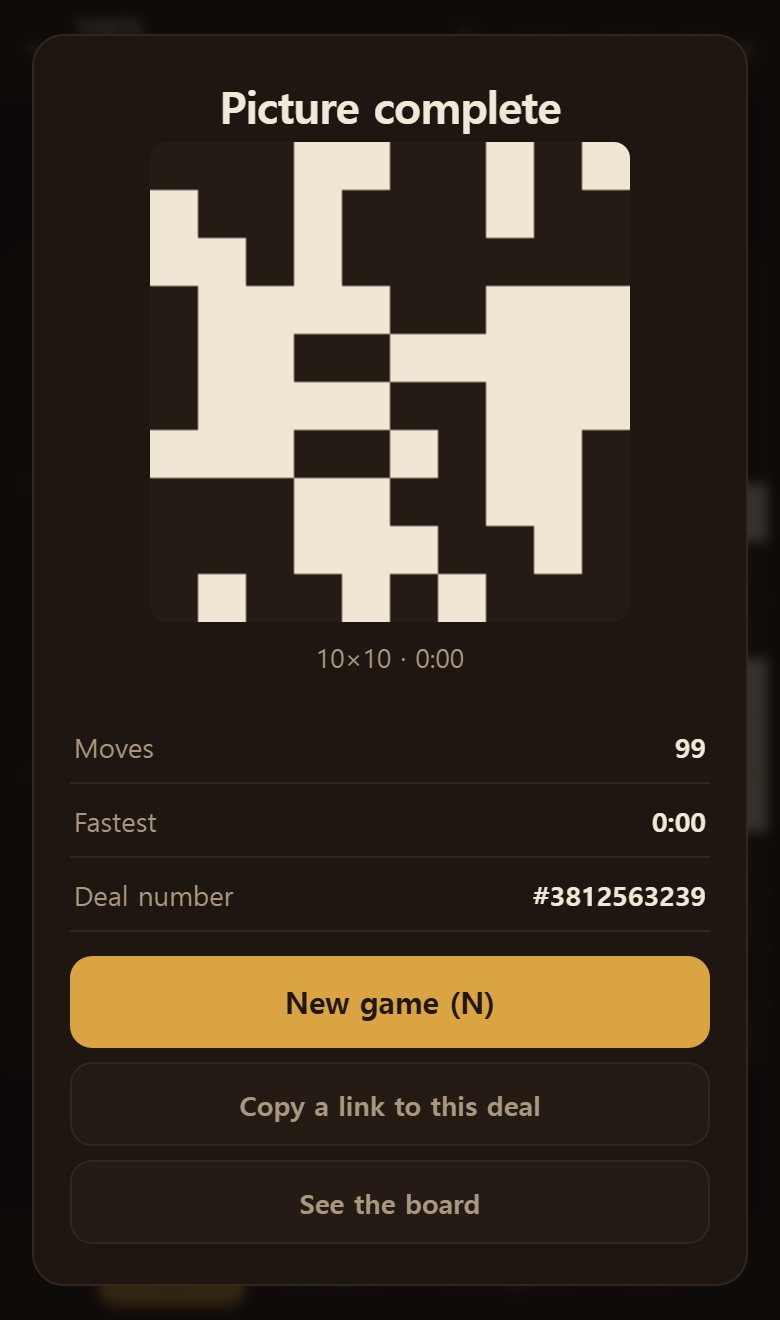
Get every square right and the numbers and grid fall away, leaving the picture, large. What it was, you only learn by finishing.
A bigger grid means a more detailed picture.
- The puzzle number is kept with it. Note it down and you can open the same puzzle again.
- Moves counts how many times you tapped a square. Fewer means less wandering.
- Your best time is kept separately for each grid size.
- Copy this puzzle’s link and you can send it on as it is. The same picture comes out.
Switching between fill and ✕
Below are the Fill and Mark ✕ buttons. Whichever is active shows lit.
- Set to Fill and drag, and every square you cross fills in a run.
- Set to Mark ✕ and drag, and every square you cross becomes an ✕.
- For covering a whole line with ✕, this is far quicker.
- Simply tapping a square cycles empty → filled → ✕ → empty.

With a finger, switching modes and dragging is easier; with a mouse, cycling by tapping is quicker.
Finished lines fade their numbers
When a line is complete, its numbers fade. There is nothing left to read there.
- Watching the faded lines grow shows you what is left at a glance.
- Among the lines still unfaded, go back to those with the biggest numbers. They yield the most certain squares.
- Alternating rows and columns makes the faded lines multiply in steps.
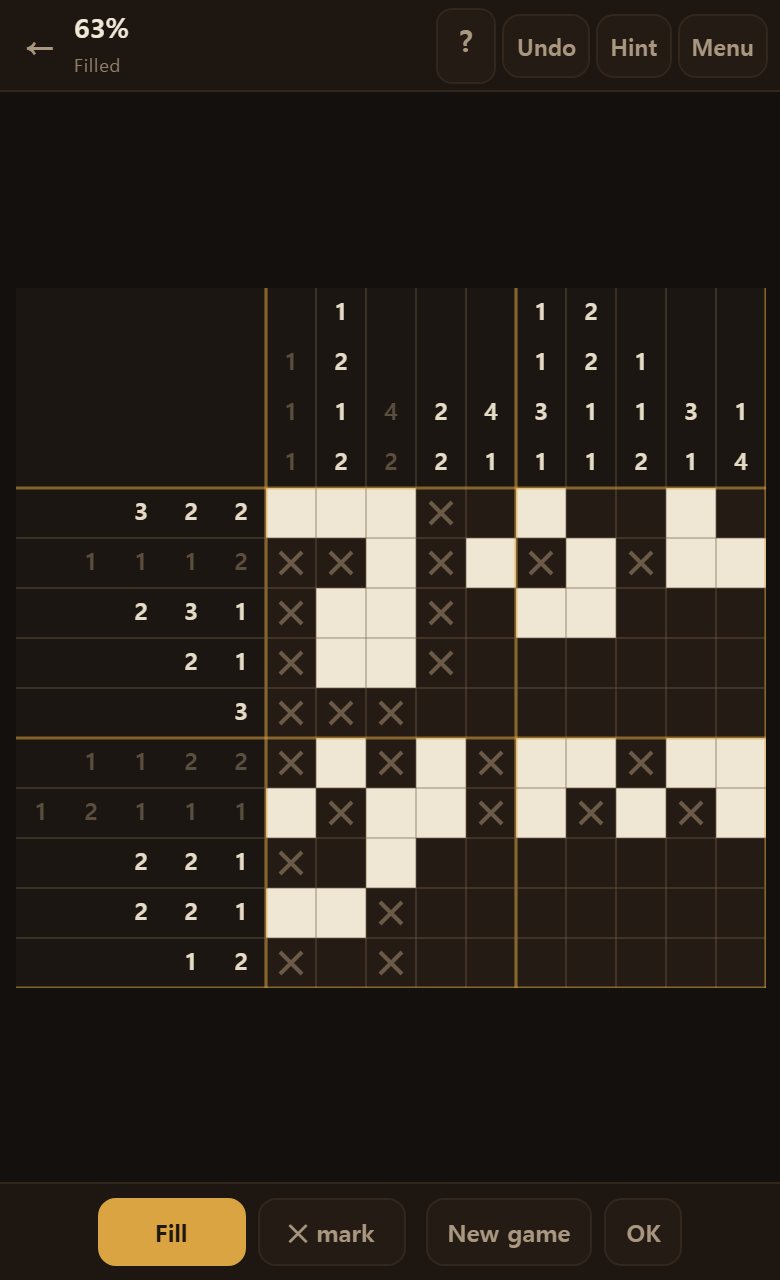
This marking spares you counting a finished line all over again — the single biggest waste of time in this puzzle.
The Check button
Press Check below and it tells you whether any filled square is wrong.
- It says only whether there is a wrong square, not where.
- If everything is right, carry on with an easy mind.
- If something is wrong, undoing back to the last point you were sure of is quicker.
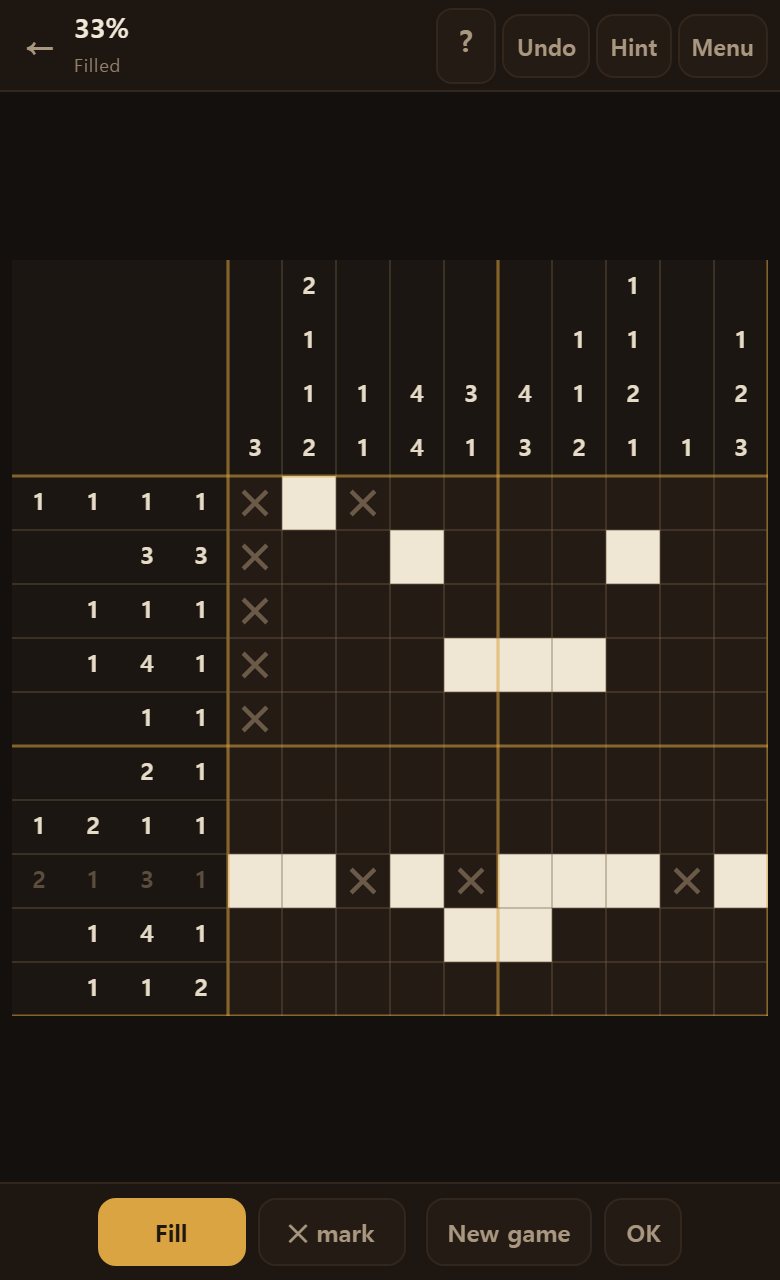
The cruellest thing in this puzzle is discovering an error long afterwards. Press this whenever you get stuck and it never happens.
Hint
Press Hint at the top and it points out one square that is certain from what you already know — and tells you which line gave it away.
- It never hands you the whole answer. One square at a time.
- If you have filled a square wrongly, it tells you about that first.
- If there is nothing to point at, it says so — which means you have either finished or gone wrong somewhere.
When the hint points at a square, count out for yourself why. Doing that once is what makes you see it unaided next time.
Undo
Press Undo at the top and your last action never happened. Fills and ✕s alike step back one at a time. On a keyboard it is Ctrl+Z.
- A drag that filled several squares steps back as a single action.
- You can go all the way back to the start, as often as you like.
- To hunt down an error, press Check before you start undoing.
How to solve well
There are only a handful of techniques here. These five are nearly all of them.
- Start with the lines holding big numbers. They yield the most overlap.
- Overlap — push to the left end, push to the right end, and whatever overlaps is certain.
- On a finished line, ✕ the remaining squares. The crossing lines suddenly become easy.
- Alternate row → column → row. Cling to one direction and it will not solve.
- Count from the ends of a line. An end is a wall, so there are fewer possibilities.
All five are really one — fill only what is certain. These puzzles never need a guess, so the urge to guess means there is a line you have not read.
Common mistakes
Puzzles that stall nearly always come down to one of these four.
- Filling on a guess — the most common. One wrong square throws off every line that crosses it, and you only find out much later.
- Not writing ✕s — it still solves, but the empty squares do not register and you count the same line over and over.
- Clinging to one direction — read only rows and you stall quickly. The new information is in the columns.
- Not closing off a block — once a block is complete, the squares either side must be empty. Leave those unmarked and you will confuse yourself again.
All four come from treating something uncertain as certain, or from not writing down what is certain.
Common questions
No. You can solve without it. But marking them makes the remaining squares register, which is much faster.
Just tap it again. You can also step back one action at a time with Undo at the top.
One square somewhere is wrong. Recount, starting with the lines holding the biggest numbers.
At least one. It may be more. How many, you learn from the crossing lines.
Yes. Start small. A big grid is only the same methods applied for longer.
Never. Every puzzle is checked to solve to the end by reading lines one at a time before it is dealt.
Push the line’s blocks as far left as they will go, then as far right as they will go. Any square filled in both cases is filled wherever the blocks actually sit. Those are your certain squares. A number larger than half the line’s length always produces an overlap.
No. It says only whether there is one. Telling you where would turn the puzzle into guess-and-check, which is no longer solving.
This puzzle only solves by alternating rows and columns. A square won from a row becomes a clue for a column, and one won from a column becomes a clue for a row. Cling to one and you will always stall.
- Start with the big numbers. A run close to the line's length overlaps itself whichever way you slide it.
- Mark the rest of a finished line with ✕ and the next line opens up.